


 Computer Notebook:
Setting up the EEEPC
Computer Notebook:
Setting up the EEEPC
This content is saved for historical purposes and is no longer updated.
First Impressions of the EEEPC
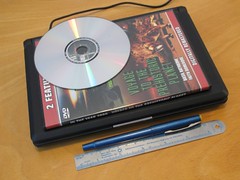
Although I've handled a EEEPC before, I was surprised by its size. The best way to think about it is that it is just bigger in length and width (by about 1-2 cm) than a DVD case. In weight, even with the battery, it weighs about what a full 1 liter bottle of water would weigh. It does not feel heavy at all.
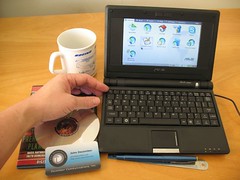
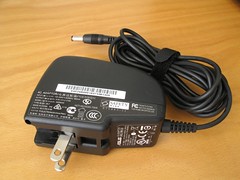
My impression is that it is a compact computer that seems well-built. I also appreciate that the AC adapter is not bulky or too heavy.
Setting Up the EEEPC
The computer was easy to set up. Just follow the Quick Use Guide in the box. Put in the battery and charge it fully. I was using the computer in minutes out of the box.
Some Adjustments
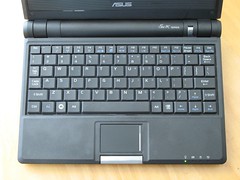
- Settings->Touchpad: I adjusted the sensitivity of the touchpad to be higher (so that a slighter finger movement will cause the cursor to move) and the tapping time to halfway between slow and fast and disabled "faster tapping." I played around with these settings until it corresponded to what I'm used to on my main computer's keyboard. Adjusting these settings seemed to help me feel more comfortable with the EEEPC as it then "felt right." I played the solitaire game quite a bit so as to get used to using the touchpad for dragging and dropping.
- Settings->Personalization: I chose the "Blue" Desktop theme because it seemed to offer a clear contrast.
More Memory
Instead of the installed 512KB of memory, I wanted to have more. So I also purchased 1 GB of memory with the computer.
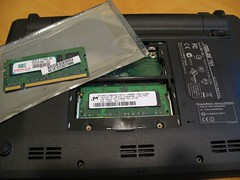
I watched this video for an overview of how to install the new memory. This video is just a bit confusing (besides its hard-driving disco beat!) in that it shows the new (1 GB) card being installed twice. The bottom line: you need to (at our own risk, but not voiding the warranty) open the back panel, take out the old memory (512 MB), and put in the new memory (1 GB) card. I was confused by the video as it shows the new card being put in twice (I guess for emphasis--those French!).
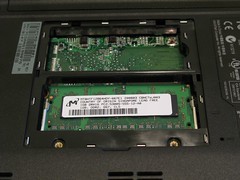
I got the new 1 GB of memory and turned the EEEPC off and upside down.
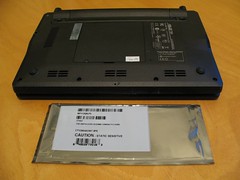

I opened the back panel, and then I took the old memory out and put the new memory in.
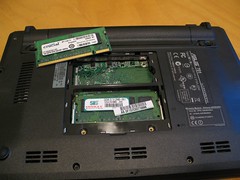
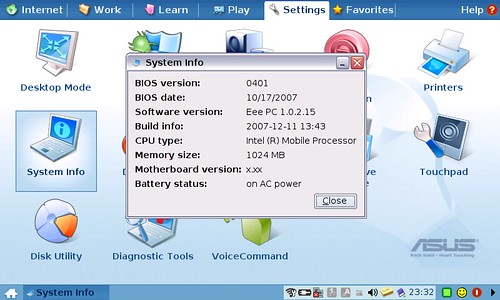
After replacing the panel and powering up the computer, I went to Settings->System Info and could see that my memory size now stood at 1024 MB.
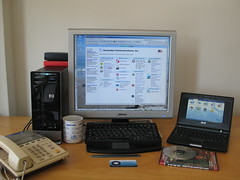
I think it seems faster, but I am also getting used to the computer itself and getting a better feel for its response. My desktop PC has 2 GB of memory and a 2.40 GHz processor versus the 1 GB of memory upgrade and a 800 MHz processor for the EEEPC. The EEEPC is going to seem a bit sluggish to me.
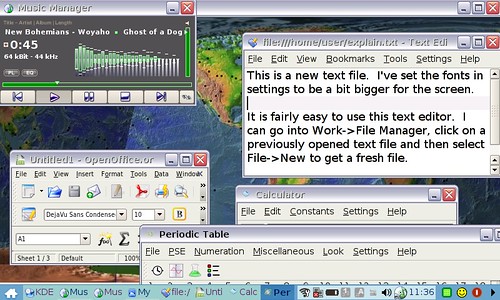
I was able to open several applications at once with no problem:
More Storage Space
The 4 GB hard disk on the EEEPC is pretty awesome. Many ancient Geeks remember a time when a 10 MB hard drive on a PC was something to drool over!
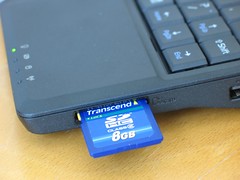
I also purchased 8 GB SD HC Card with the computer. To use this, I put it in the slot on the right side of the computer. When in the slot, the EEEPC will detect it. An SD Card icon appeared in the taskbar. You can then use it to store documents.
I wanted to transfer some plain text files from the EEEPC to my desktop PC:
- I inserted the SD card into the slot on the right side of the EEEPC.
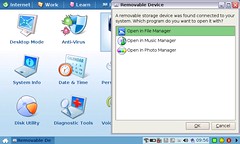
You need to push it all the way in until it catches and stays in. Once the
EEEPC detects it is in, a window comes up to ask how to handle it. I clicked on OK to use the File Manager.
- On the EEEPC, I used Work->File Manager to copy the plain text files I wanted to transfer onto the SD Card. A simple copy and paste transfer worked.
- When the files were transferred, I did a right click on the SD Card icon in the taskbar and selected "Safely remove."
- I then pushed in on the card's edge a bit, and it sprang back out, and I gently pulled the rest of the way out of the EEEPC. This is similar to the way an SD card operates in my digital camera.
- I then put this SD card into the SD Card reader on my desktop PC (Windows Vista).

- On my desktop PC, I went to Computer and looked in Removable Disk (H:), and there were the files.
- I copied then and pasted them to my PC's hard disk, and they were fine.
- I then did a right click on the Removable Disk (H:) on my desktop PC and selected "Safely Remove."
- I then could take the SD Card out.
Back in ancient times (ask your parents or grandparents), something called "floppy disks" worked this same way: you could store things on them or transfer files from one computer to another. I'm glad this SD card file transfer system works so easily (the SD Card reader built-in to my desktop PC's chassis helps) as I simply want to use the EEEPC to write plain text files and then transfer them to my main PC. This is one alternative that does not use the Internet for transfer or storage. Note that I can reverse this process to get something onto the EEEPC.
Note that another choice is to use docs.google.com and work with all your documents online and avoid this old-fashioned SD card stuff.
A Hard Case for the EEEPC!
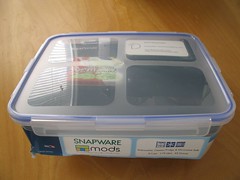
I like to carry the EEEPC, but I don't want to carry it around in my backpack loose. I want to have some sturdy, water-tight container for it. After searching for a while, I found one!
I bought a plastic food container at a Target department store that is just the right size to hold an EEEPC. The container is made by Snapware� and is called the "MODS� (Modular Organized Durable Storage) Food Container - Large 8 Cup Rectangular by Snapware�." Its dimensions are 2 inches x 10 inches x 8 inches with a volume of 8 cups (this is 5 cm x 25.4 cm x 20.3 cm with a volume of 1.8 liters). I paid $5.99 for it in the store. You can buy a case like this in a set of Modular Organized Durable Storage (MODS) Food Storage Containers by Snapware. I also use other containers in this set to hold my camera and lenses in my backpack. These cases provide a waterproof and crush-resistant carrying case which help protect the electronics. People tell me you could carry food in these containers, but not food and electronics in the same container at once.
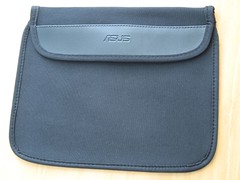
Put the EEEPC in its protective neoprene sleeve and then inside this MODS container. I can also fit in a small mint tin that holds my earbud/microphone (for skype calls).
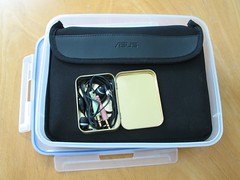
With the cover on, there will be no rattle. Most importantly, the airtight seal keeps your data fresh!
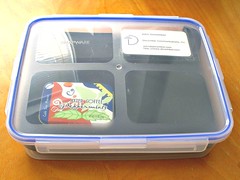
Note that this container cannot fit the power adapter also. I carry that in a separate plastic container.
Installed Operating System
Note that I have updated the operating system from what came installed on the EEEPC. See the Updates. The information below is kept for reference.
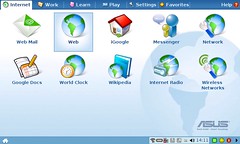
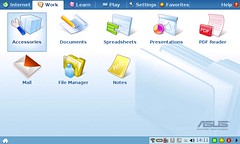
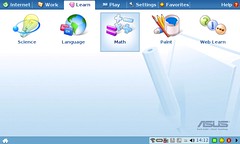
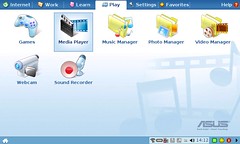
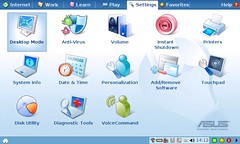
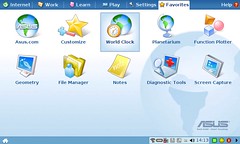
The operating system interface that comes installed (called the Easy Mode interface) is a window manager with big, colorful web 2.0-style icons:
You can install a full desktop mode as an alternative interface.
Full Desktop
Although the Easy Mode interface that comes with the EEEPC is fine for most users, I prefer to have a desktop that looks more like the Unix workstations or windows interface on a PC that I've been using for decades. You can get a full desktop on the EEEPC fairly easily (the K Desktop Environment (KDE)). I followed these instructions for setting up the full desktop. There are more instructions at EEEUser, but cannot understand them--there is too much information, too many steps, too many options, and it is too confusing to follow. If you prepare or know of a clear, concise, cogent, comprehensible set of instructions, I'd love to link to them. In the meantime, here is what I did to get Full Desktop mode on my EEEPC:
- I connected to the Internet by plugging the Ethernet cable from my DSL modem into the side of the EEEPC.
- I went to Work->File Manager and hit Ctrl/T to get a terminal session
- To gain root access, I entered
sudo bash, and then I enteredapt-get update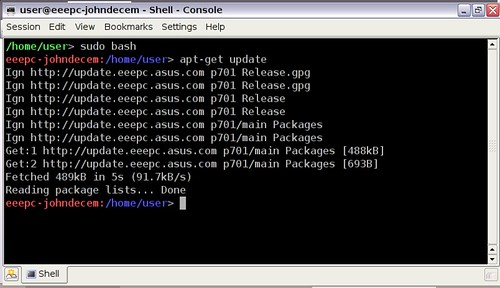
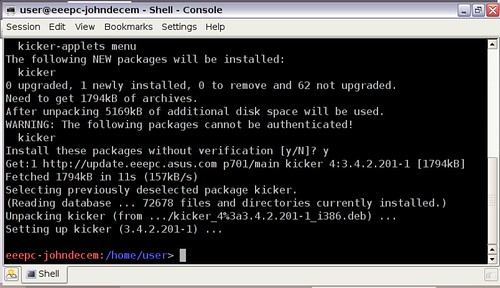
- I entered
apt-get install kicker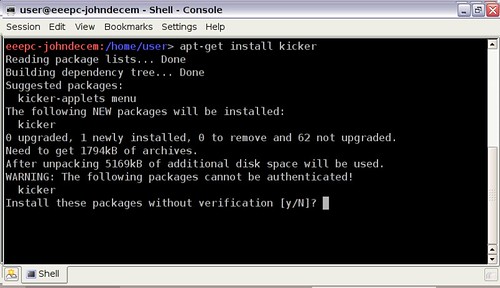
I responded "y" and pressed return.
- I entered
apt-get install ksmserver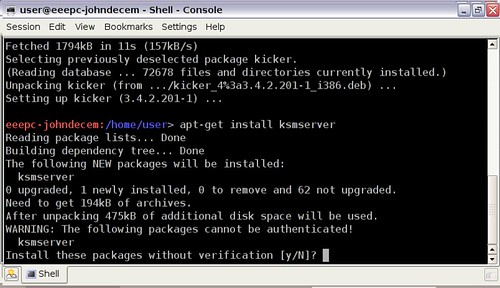
I responded "y" and pressed return.

- I then entered exit to exit root mode and exit again to exit the shell.
At the end of entering these instructions, I restarted the computer.
Then, when the Easy Mode interface came up, I went into Settings->Personalization and clicked the box next to Full Desktop mode.

I then restarted the computer. When I start the computer again, it enters full desktop mode to start.
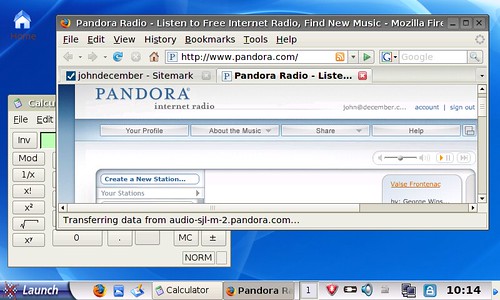
Tweaking Full Desktop
I have my own little customizations that I made to the Full Desktop mode:
- Launch->Control Center->General Settings->Desktop Behavior->Desktop: uncheck show icons on desktop (I like a clean desktop! I use the launch and toolbar to access applications.)
- Launch->Control Center->General Settings->Desktop Behavior->Multiple Desktops: reduce number of desktops to 1 (one is plenty for me, thank you very much).
- Launch->Control Center->Display->Panel/Taskbar->Panel->Advanced Options: Applet Handles Hide (I don't like the look of these).
- Launch->Control Center->Display->Panel/Taskbar->Panel->Size: Tiny
- Panel Menu->Right Click->Panel Menu->Remove from Panel->Application Button->Thunderbird Mail Client (I will use Web-based mail only).
- Panel Menu->Right Click->Panel Menu->Remove from Panel->Special Button->Desktop Access (I have just one desktop).
- Panel Menu->Right Click->Panel Menu->Remove from Panel->Applet->Desktop Previewer and Pager (I'm glad I have just one desktop so that I don't have to figure out what this does).
- Panel Menu->Right Click->Panel Menu->Remove from Panel->Applet->System Tray
- Launch->Control Center->Display->Theme->Theme Manager->Choose Theme: Redmond (provides nice contrast--I find this easy to read!)
You can update the system using the Synaptic Package Manager (Launch->Applications->System->Synaptic Package Manager). But, use caution. I tried some updates, but then I had to do Factory Restore twice because the computer got locked up! I have resigned from adding anything more until I can figure out how to do it properly. I am satisfied with the simple tasks this computer does, and I am reluctant now to make it too complicated.
Updating the System
See the Updates Section.